Listening to Physical Music and an iPod Nano
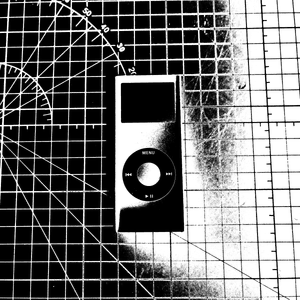
I first started using Spotify in 2016, I migrated from Pandora and created a playlist with all of my favorite songs. That playlist has now grown to more than 3,000 songs (almost 8 days of continuous playback). So when I decided to quit Spotify last year, it was no small task. This is a sort of log and guide of my journey doing so.
How I got started
Weirdly, the first step for me was not to delete Spotify from my phone but rather to change the way I listen to music. Spotify's generated "Discover Weekly" playlist was how I found new music and kept up with artists I already knew. While my large playlist is what I would shuffle whenever I just wanted something to listen to. These two things are essentially what kept me chained to Spotify as a platform. A chain which would only break if I changed my listening habits.
I started small: grabbing a few of my parents' old cds to listen to while in the car (something that isn't possible for everyone since a lot of cars no longer have CD players). Listening to CDs in the car also began to change my listening habits, putting a larger focus on listening to an album rather than shuffling a large playlist. Then I started slowly growing my CD collection: visiting local record stores and the occasional Half Price Books looking for albums that interested me. Naturally this did skew a lot of my music taste to before the 2010s just due to availability. More on this later.
Buying an iPod
Listening to music on my phone worked really well, but I found myself longing for a dedicated music device (A DAP (Digital Audio Player) if you're a nerd). There are plenty of devices out there that offer high end audio playback but most of them are fairly expensive and also have touchscreens which I find to be ugly.
But there is another option: old iPods.
Most iPods are readily available secondhand and can be found much cheaper than modern digital audio players. However, there is a lot of variance here. iPod Classics tend to be more expensive than their counterparts because of a large modding scene which creates a lot of demand. Other lines of iPods don't suffer as much; The iPod Mini for example is still cheap and also easy to take apart. But if you paid attention to the second part of that sentence: the others aren't easy to take apart. Most iPod Nanos are packed tight to be so small and thus require a lot of careful prying to get at their internals. An issue compounded by issues like the "black spot" from the battery expanding insided. But, with all that said, they can still be found for really cheap: I picked up my iPod Nano 2GB 2nd Generation for about $20 dollars on eBay.
Installing Rockbox
Buying an iPod naturally came with one large caveat: I do not and have never owned a Mac. Currently all of my computers run some variant of Linux, a platform that iTunes definitely does not support. But what if I could get Linux on my new iPod? This is where Rockbox comes in.
Rockbox is a firmware replacement for a lot of devices that are capable of playing music including most iPods. It allows for larger codec support (including FLAC which original iPods cannot play) as well as theming and the ability to plug your device into a computer as if it was an external drive. Generally, if you have an iPod you want to have Rockbox on it.
However, the installation comes with one caveat: the iPod needs to be initialized with a Windows computer running iTunes. I did not have such luck with my iPod as it came formatted with a proprietary Mac scheme. The Rockbox website does have a page for reformatting your device without the need for a Windows computer. But you need the partition tables for your exact device for it to work. Partition tables that I could not find for the iPod Nano 2nd Generation that I now had.
After a lot of experimentation and failed attempts, I bit the bullet and setup a Windows virtual machine. Luckily when I connected my iPod iTunes recognized and formatted it, finally allowing me to install Rockbox.
Buying and Ripping CDs
So to get music onto the iPod, we need music files. You can buy digital albums from iTunes or preferably Bandcamp. However, I much prefer buying CDs because I enjoy owning a physical copy. So I started hunting through all of my local record shops which often have CD sections in addition to vinyl. Half Price Books is also a great place to find more popular albums.
After acquiring a CD, I setup my old CD drive by taking apart the case (which does not have a slot for a CD drive) and plugging it in. Then I use abcde (A Better CD Encoder) to rip the CDs into mp3 files (FLACs are simply too large for the 2GB of space I have on the iPod). Then I use ncmpcpp (NCurses Music Player Client Plus Plus) to edit all the metadata since the interface is nice for bulk editing. However, being a terminal application ncmpcpp doesn't support adding images to files. Instead I use mp3tag running through wine.
Finally, once the files are ready, all I have to do is plug the iPod into my compute and drag the music onto the media drive that appears.